Aurora Postgres Prerequisites
Configure your Postgres destination (AWS RDS & AWS Aurora)
Step 1: Allow access
Allow write access to a portion of your RDS or Aurora PostgreSQL database.
Configure the Security Group
- In your Amazon RDS > Databases list, click the PostgreSQL instance you want to send data to.
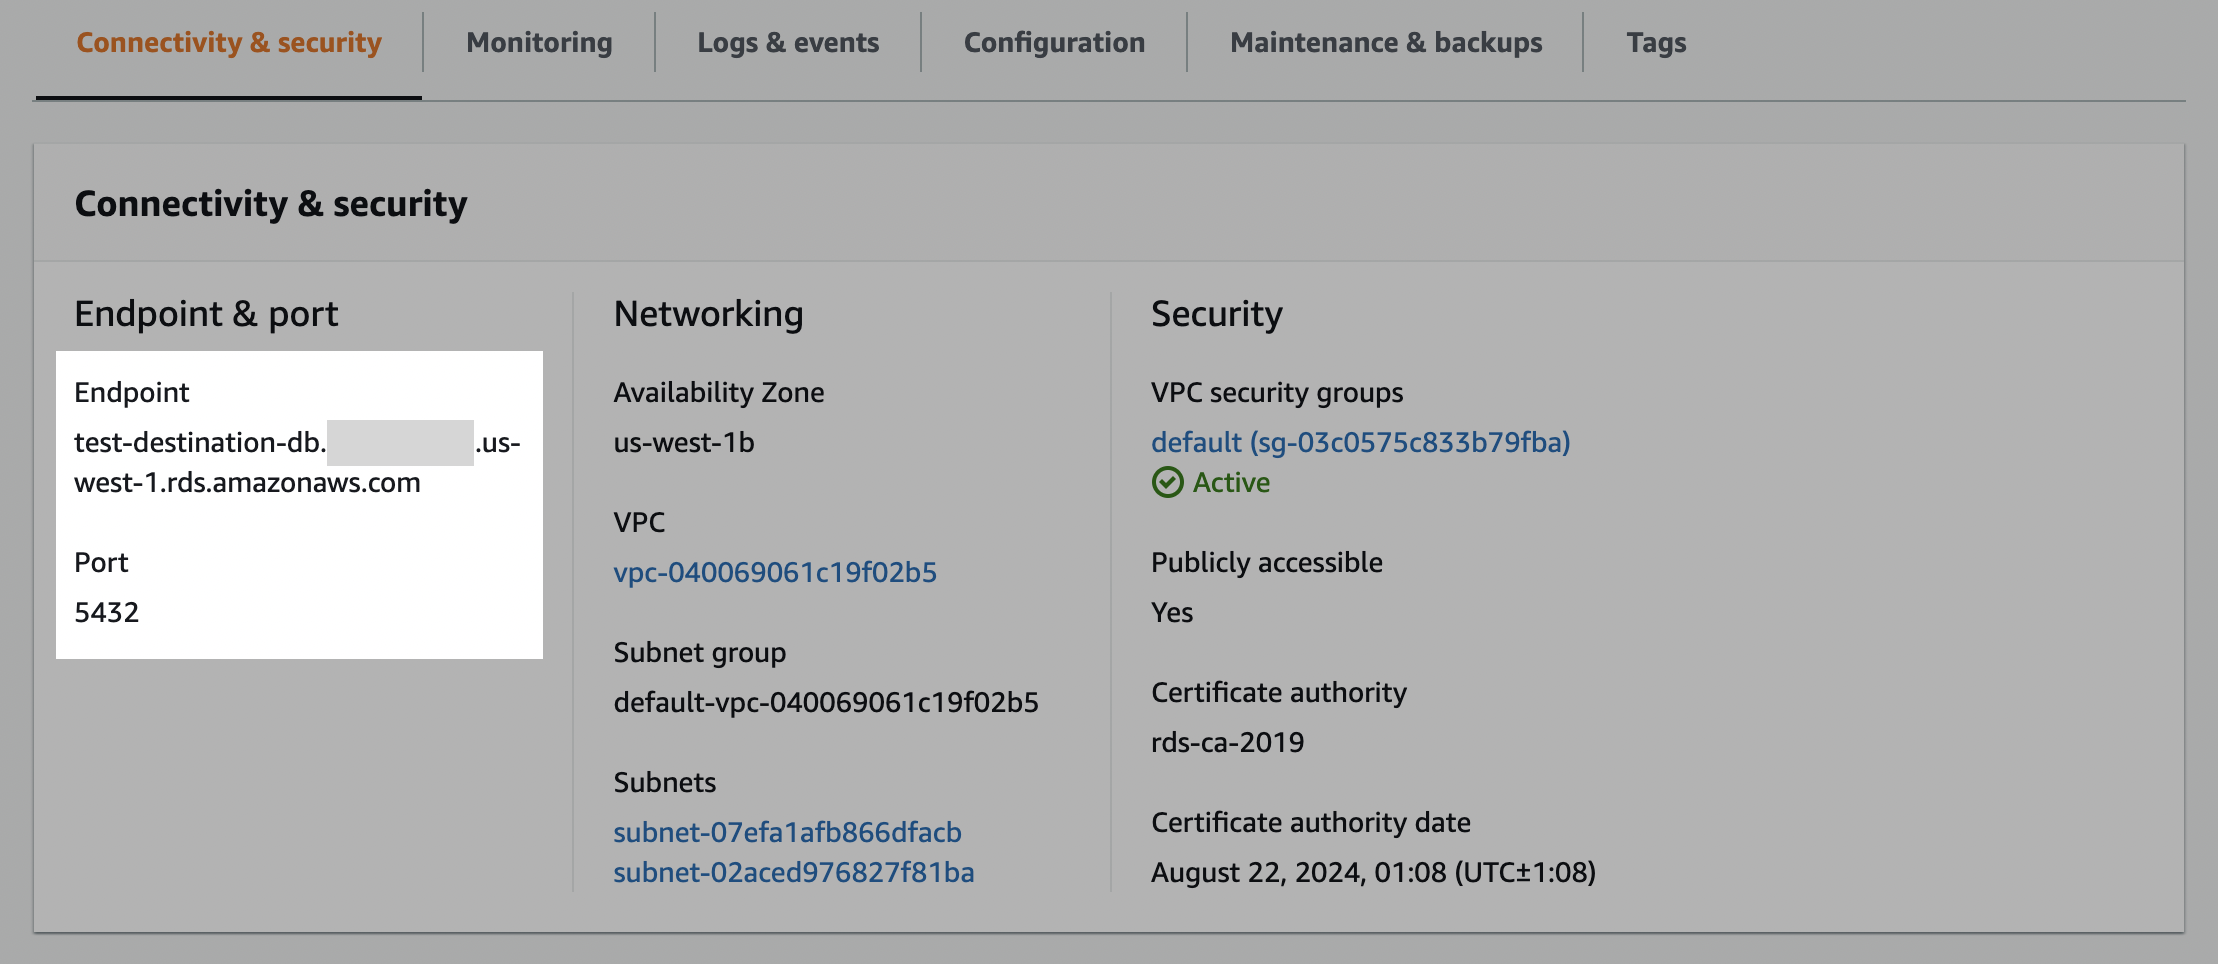
- In the database page, in the Connectivity & security tab, make note of the Endpoint and the Port number.
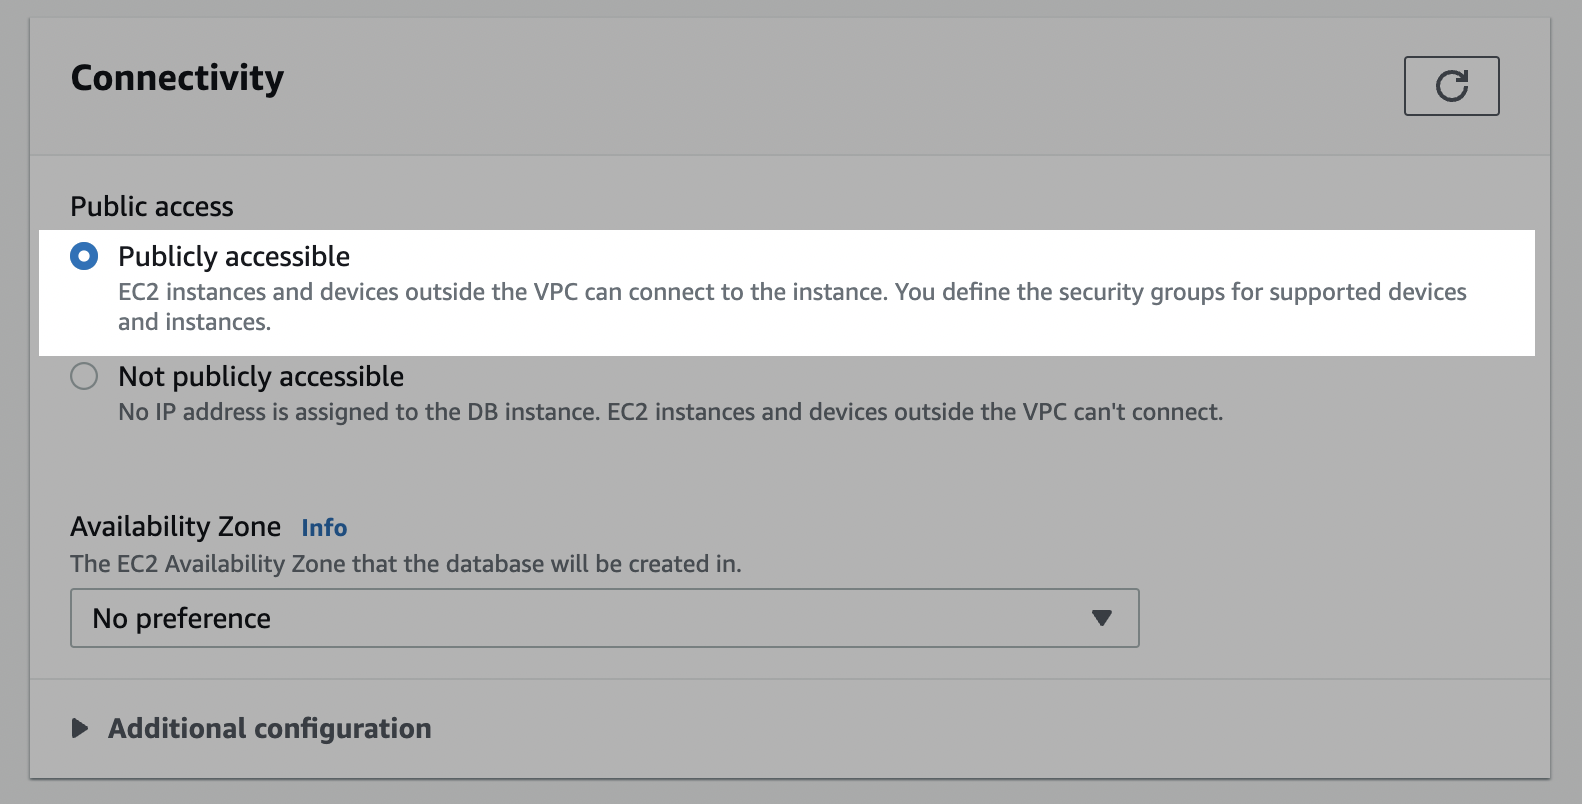
- In the Security section, ensure that set the Publicly accessible setting is set to Yes to ensure that the destination is accessible from outside your VPC. Note that it is still only accessible through whitelisted IPs at this point.
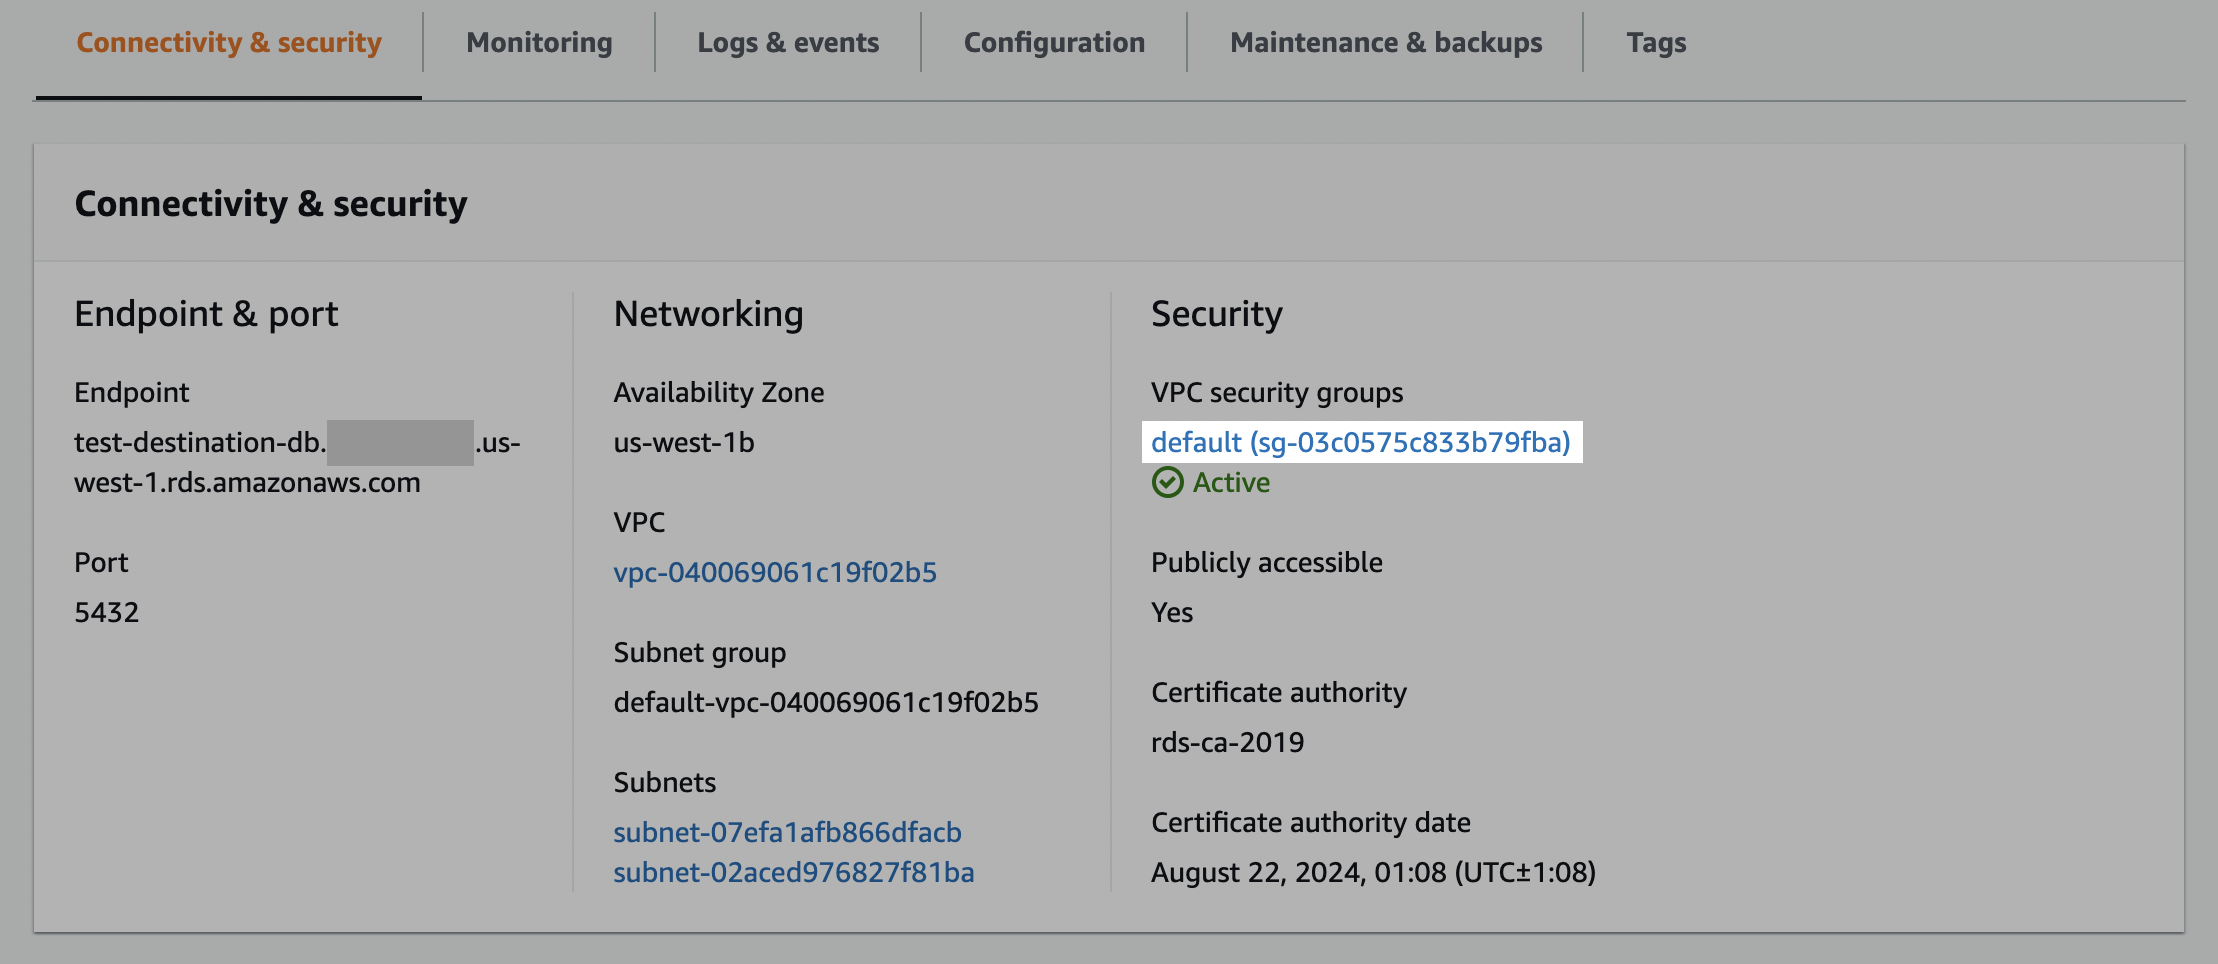
- Click one of the VPC security groups (usually
default). Note: VPC groups are permissive (vs. restrictive) and for instances with multiple VPC security groups, only one needs to be configured with the new inbound rule.
- In the Security Groups section, select the Inbound rules tab.
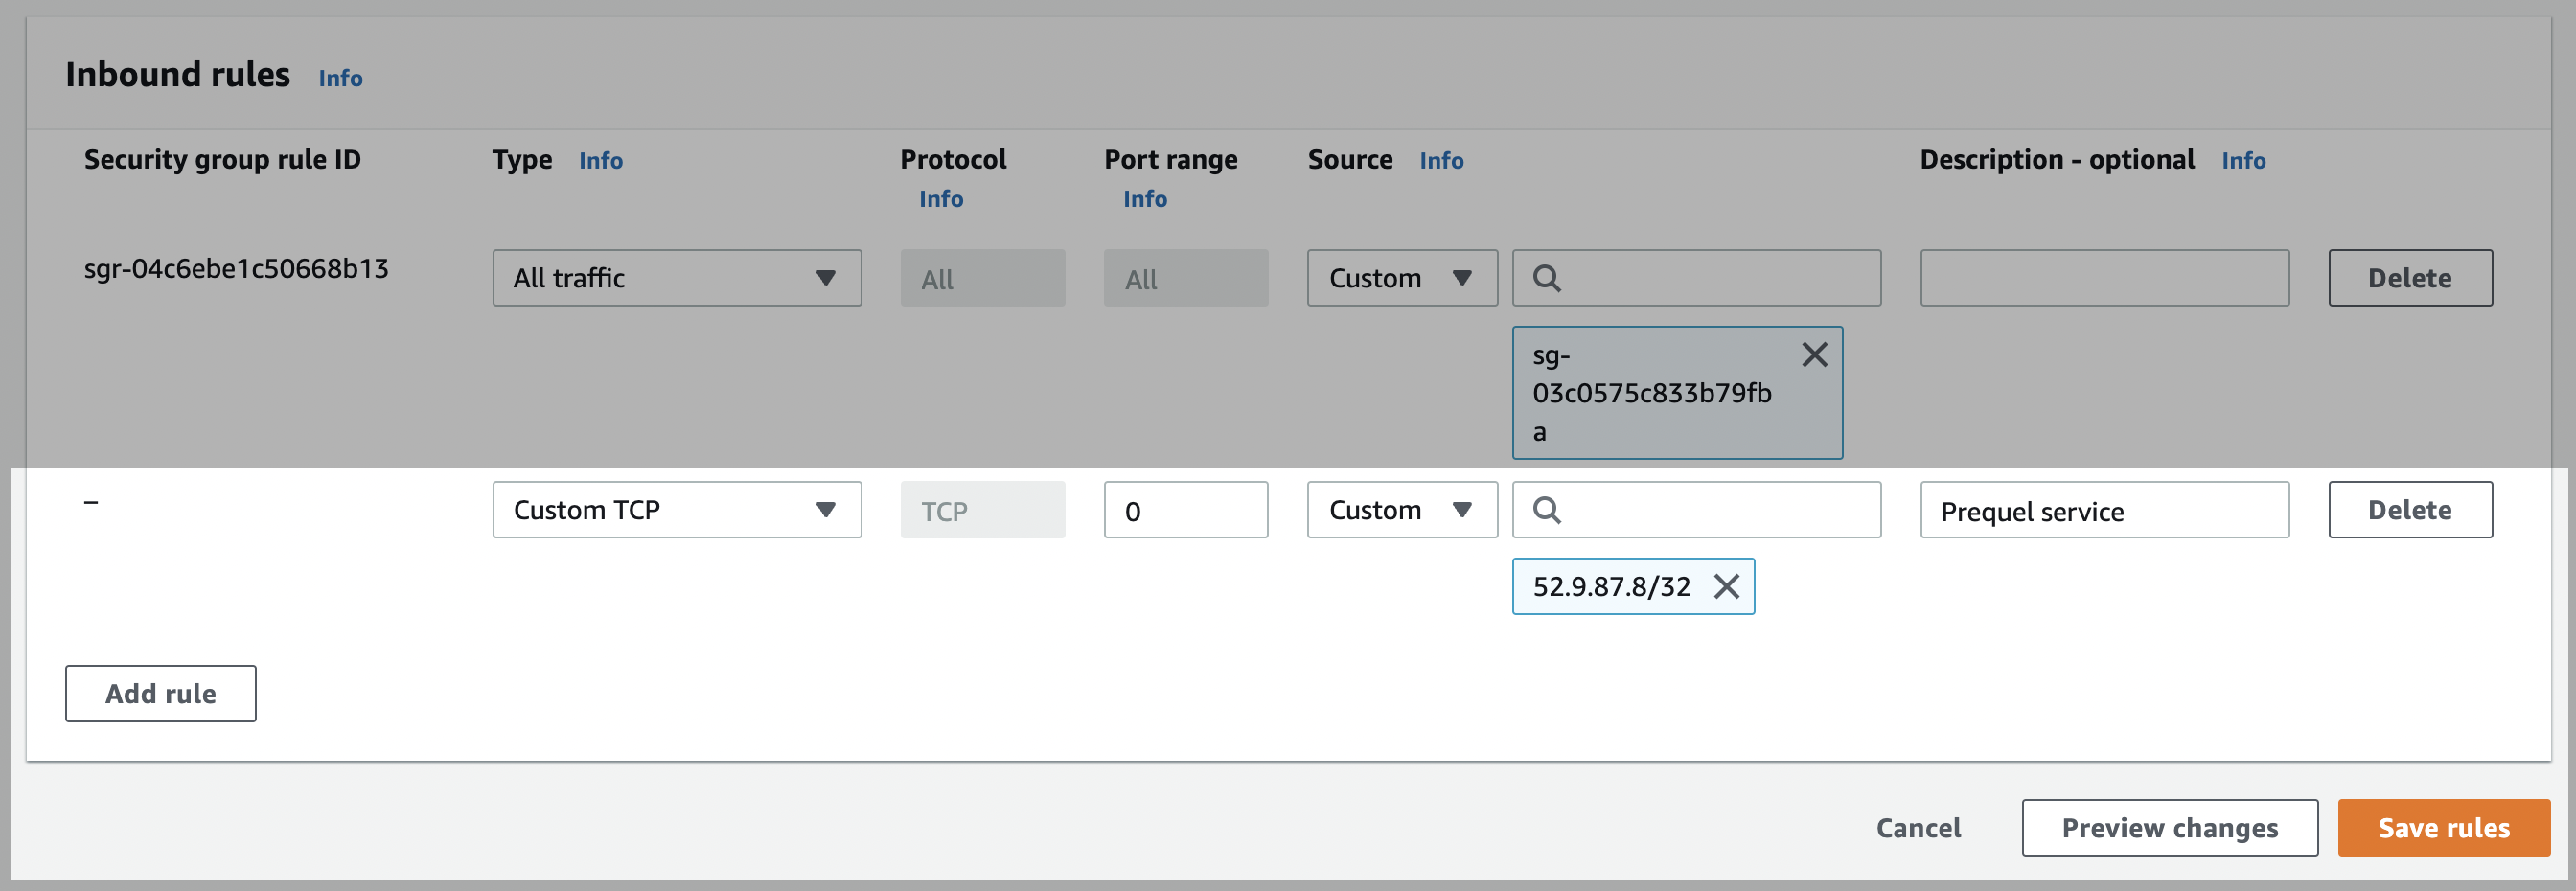
- Click Edit inbound rules and then click Add rule.
- Edit the newly created rule of type Custom TCP with the Port range noted in the first step (usually
5432) and aCustomSource value that includes all of the service IPs. Note: you will need to add/32to the end of each IP (CIDR notation). - Click Save rules.
Configure network ACLs (access control list)
For database instances in a VCP
- In your RDS dashboard, select the PostgreSQL instance.
- Click the link to the instance's VPC.
- Click the VPC ID.

- In the Details section, click on the link under Main network ACL.
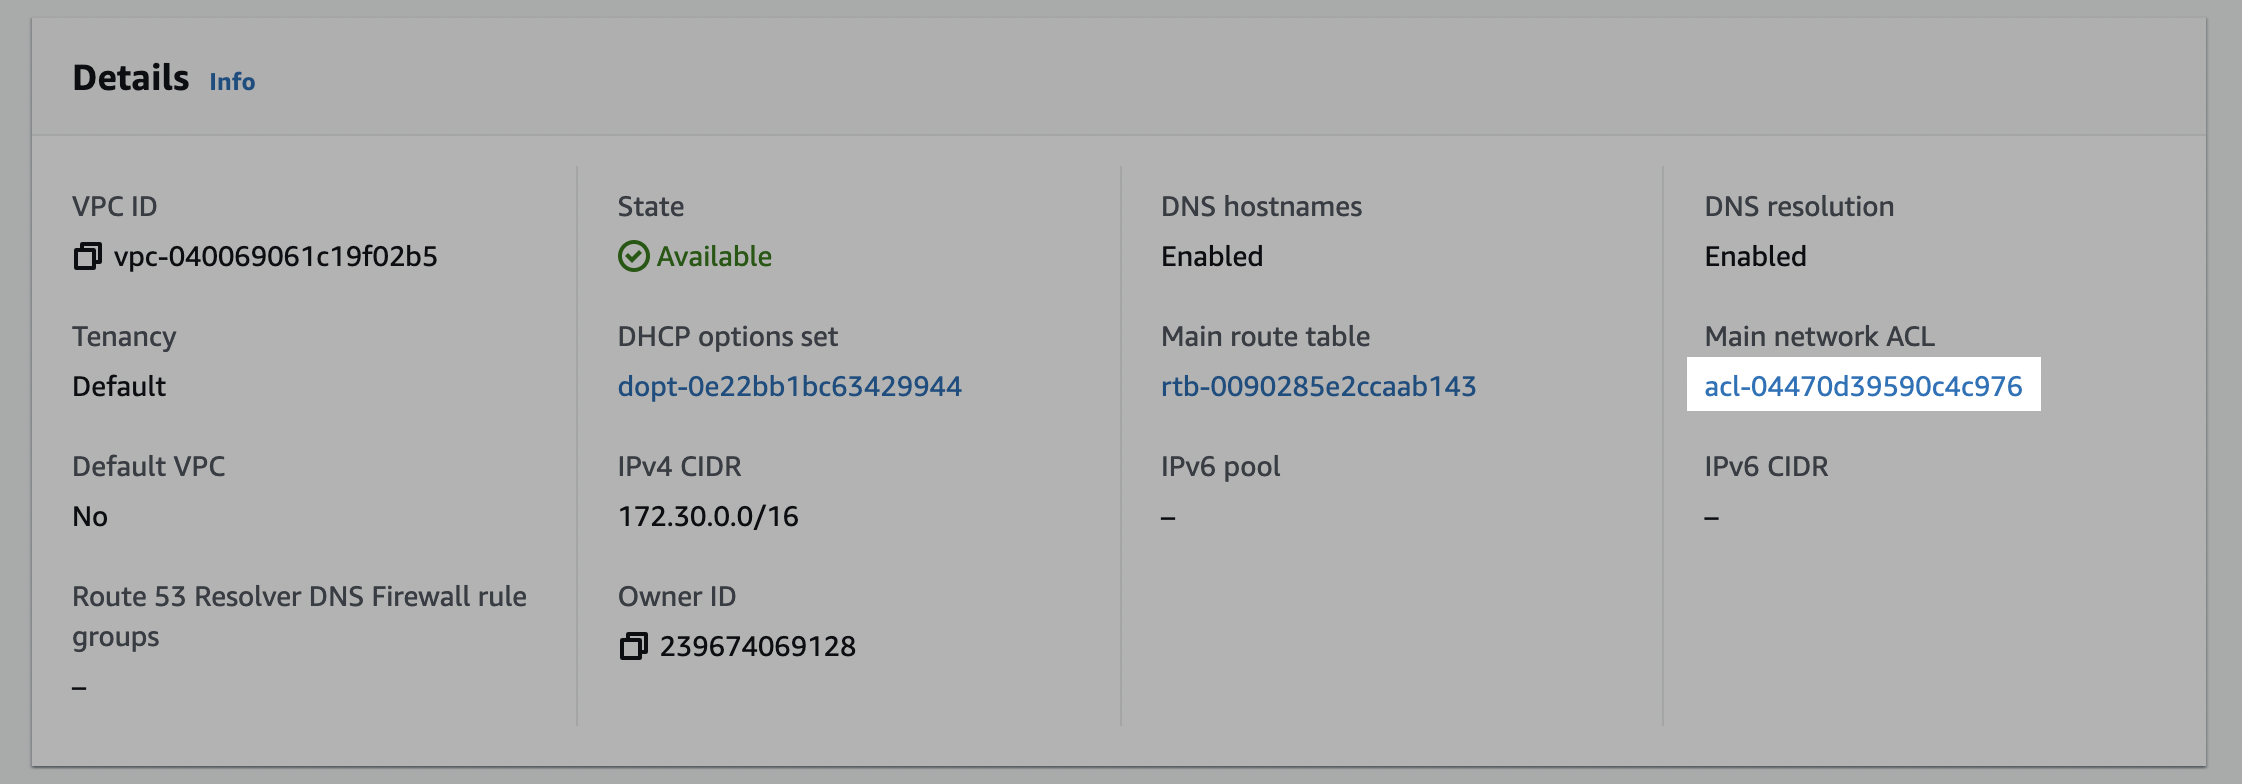
- Click on the network ACL ID.

Edit the inbound rules
- Click on the Inbound rules tab, and check if there is an existing rule with a Source of
0.0.0.0/0set toAllow. (This is a default rule created by AWS. If this rule already exists, skip to Edit outbound rules.)

- Create the inbound rule (if it doesn't exist). Click Edit inbound rules and either Add new rule or edit an existing rule to allow access to the port number of your database instance (usually
5432) from our static IP:34.171.168.215/32. Click Save changes.
Edit the outbound rules
- In the ACL menu, select the Outbound rules tab, and check if there is an existing rule with a Destination of
0.0.0.0/0set toAllow. (This is a default rule created by AWS. If this rule already exists, skip to the next step.)

- Create the outbound rule (if it doesn't exist). Click Edit outbound rules and edit the rules to allow outbound traffic to ports 1024-65535 for Destination
0.0.0.0/0.
Step 2: Create writer user
Create a database user to perform the writing of the source data.
- Open a connection to your Amazon RDS PostgreSQL database.
- Create a user for the data transfer by executing the following SQL command.
CREATE USER <username> PASSWORD '<some-password>';- Grant user
createandtemporaryprivileges on the database.createallows the service to create new schemas andtemporaryallows the service to create temporary tables.
GRANT CREATE, TEMPORARY ON DATABASE <database> TO <username>;Step 4: Gather the required setup information
For the data export setup, you will need:
- host name
- database name
- port
- username
- password
Visit the LogRocket Streaming Data Export settings page to complete the setup.
Updated about 1 year ago
What’s Next
Learn about how to configure the Streaming Data Export integration in app!
